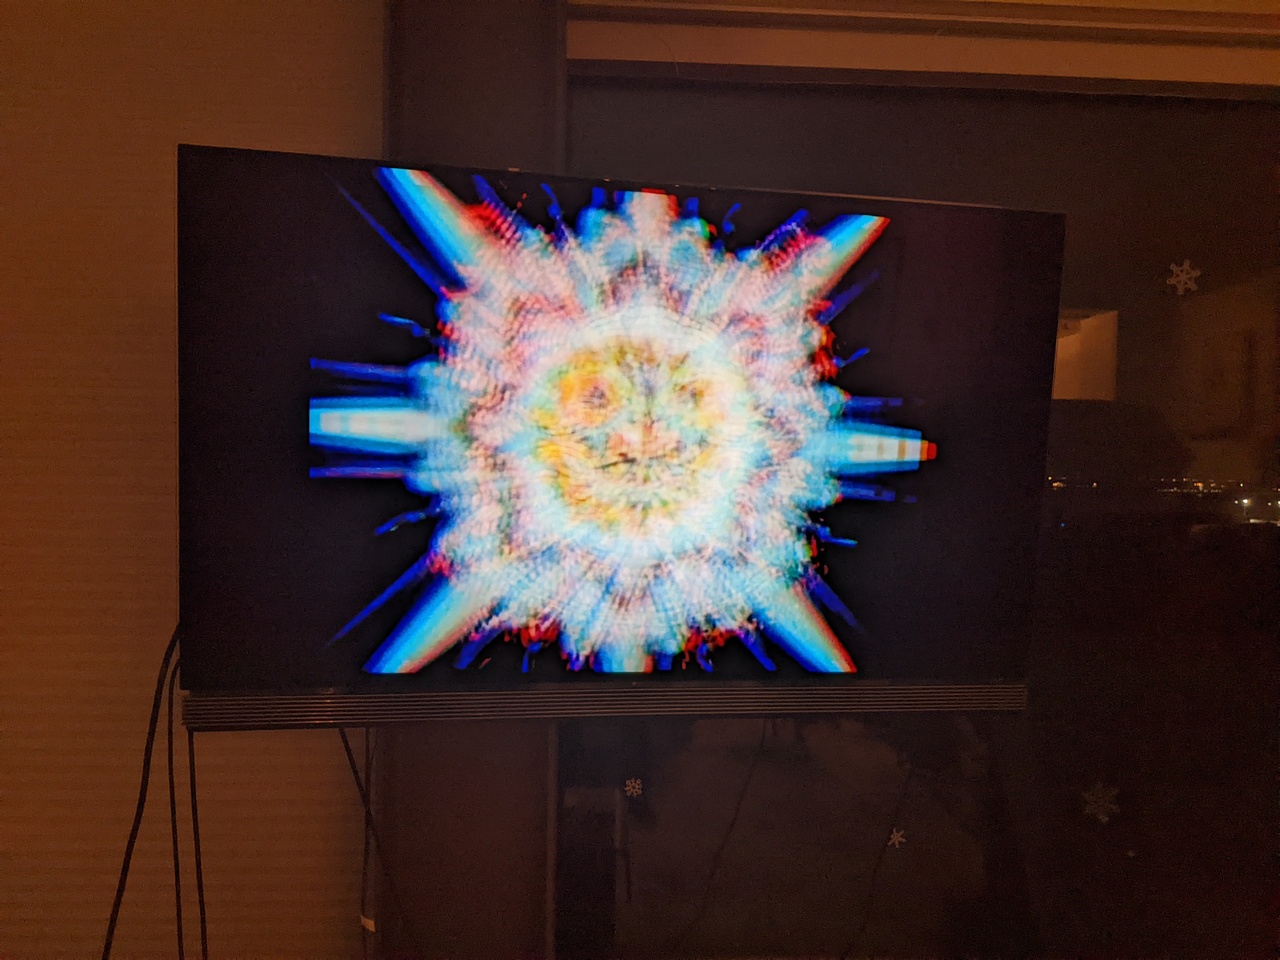
TVs today are computers with a display. Any computer can take a screenshot of its display, there’s even a [PrtSc] key on most PC keyboards to “Print Screen”. My LG TV can take a screenshot of its own screen and has a USB port, but you can’t transfer the screenshots out, probably because of Hollywood copyright BS. So I have to take phone photos of its screen.
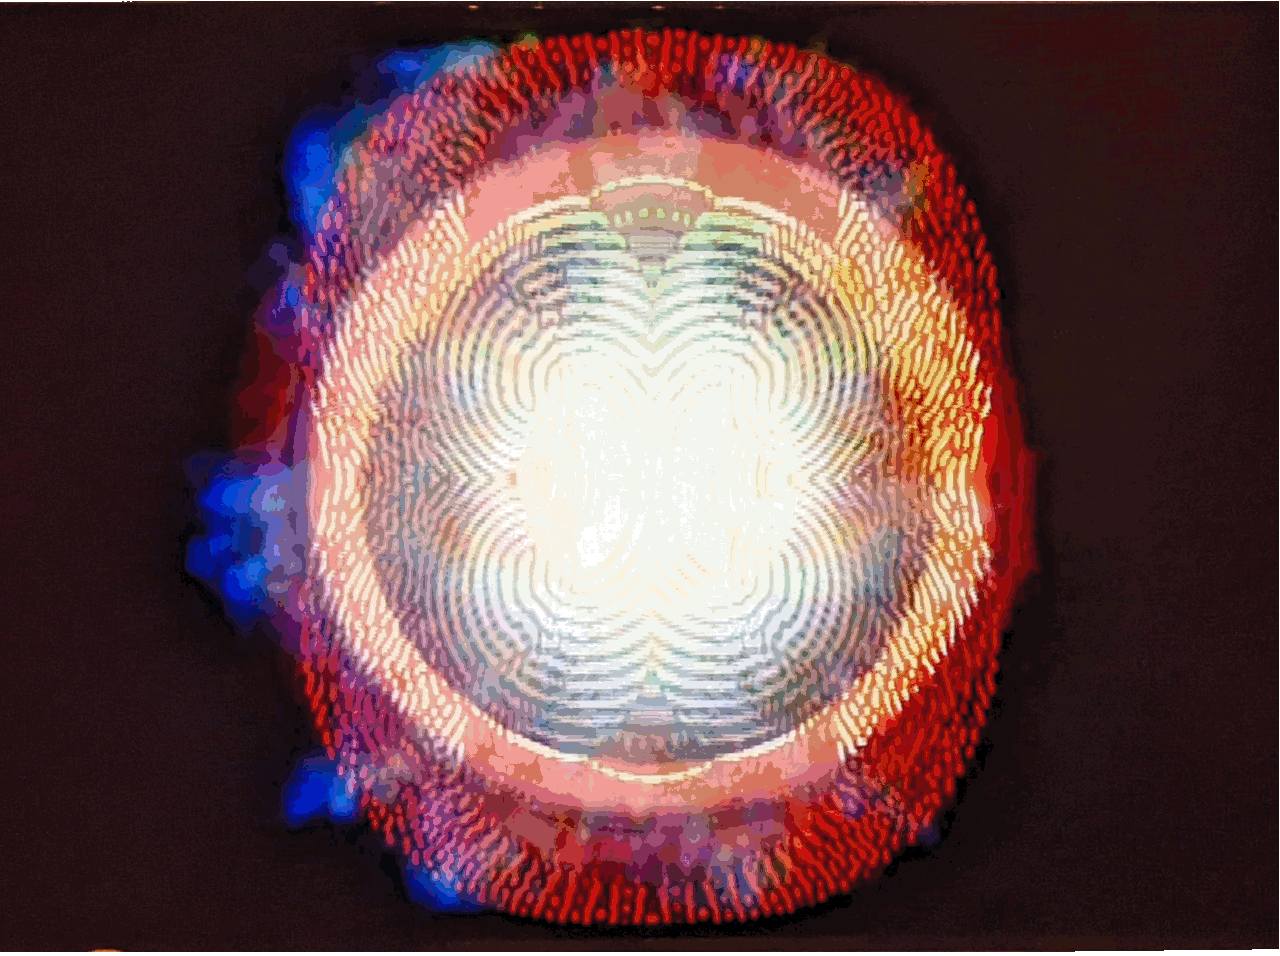
Recently I took a bunch of these to capture the feel of the fantastic analog video sequence that Steve Pavlovsky created for The Electrical Life of Louis Wain movie for another blog post.
De-warping photos
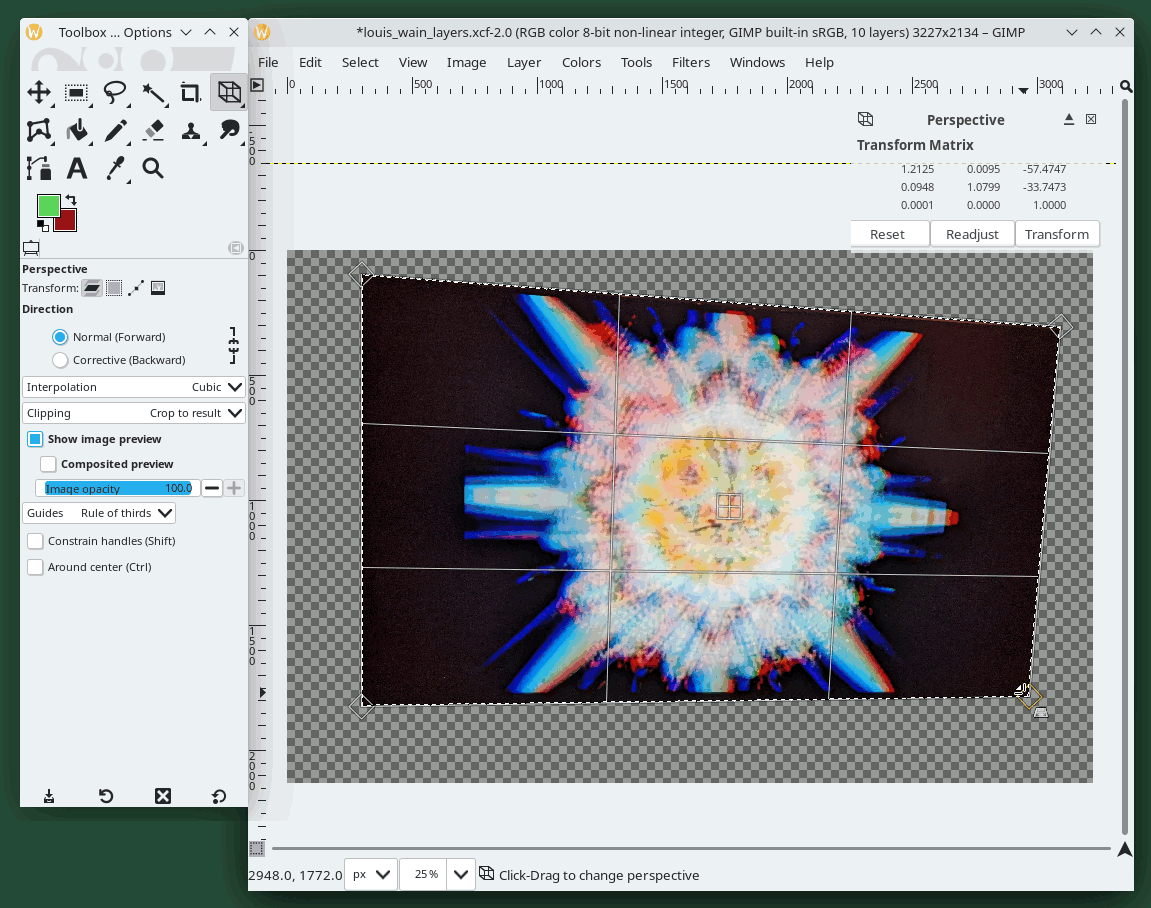
It should be simple: select the four corners of the TV screen in the photo and say “This plane in 3D space should be a 2D rectangle facing the viewer; Make It So” The free and generally excellent GIMP image editor has a dozen tools to transform an image including Tools > Image Transform > 3D Transform that sounds like it could work that way, but I couldn’t figure it out. Here’s the closest I found. I’m using the Flatpak of the development version of GIMP 3.0, which is pretty stable and getting close to release!
Theory
- Select the TV screen as a polygon, delete everything else in the image.
- Use a “Corrective (Backward)” Projection transform, settings its four corners to the corners of the remaining selection.
Steps
- Open the image
- In the Layers dialog (press Ctrl+L), right-click the image’s layer and choose Add Alpha Channel. Otherwise, when you clear (delete) part of the picture, it fills with the current background color.
- From the toolbox, choose the Free Select Tool (F) and click the four corners of the TV screen to start a polygonal selection, then click the starting point to close it and get the “marching ants” selection perimeter.
- You want to delete everything but the TV screen, so Select > Invert (Ctrl+I) and press Del to clear the selection to the checkerboard. Then Select > Invert (Ctrl+I) again to return the selection to the TV screen.
- To square up the TV… I didn’t try every transform tool let alone plug-ins, but Tools > Image Transform > Perspective came close.
- Choosing this should make a rectangle with diamonds at its corners appear. “All” you have to do is drag these four corners to the corners of the TV screen which are the corners of both the image and the current selection, but you have to get the options right. In the Perspective tool’s options (Windows > Dockable Dialogs > Tool Options if you don’t see them):
- Transform layer is OK, the selection is the entire layer
- Direction must be Corrective (backwards), otherwise you’ll be squishing down the picture even more
- leave Interpolation as default Cubic
- Clipping I left the default Crop to result
- I checked Show image preview and set Image opacity to 50% to give a hint of what was going on,
- I set Guides to Rule of thirds to show a few lines
- I don’t know about the other options.
- Now click and drag the three diamond handles that need to move to touch the corresponding corner of the TV screen/the remaining selection. I couldn’t figure out how to make the diamond handle snap to the corner of the selection; maybe I should have turned the selection into a path because snapping to nodes in a path seems to work.
- Click Transform in the floating coordinates window (or press Shift+Enter) to, as Super Mario Galaxy has it, TRANSFOOOOOOOORM.
- The transformed pixels are left as GIMP’s ^%$#@! “Floating Selection”. Every time I use the GIMP I have to search “How do I get rid of GIMP’s ^%$#@! Floating selection”; I wound up right-clicking on it in Layers and choosing Anchor Layer
This all seemed to work! It ought to correct for camera distortion (bulging sides) and 3D shortening, but it’s close enough. I left the image selection options to anti-alias and feather edges, which probably doesn’t make sense when trying to make a hard-edged animation of the image on the TV screen.
Animating the TV images
Theory
I lucked out, DuckDuckGo found a good tutorial for this. The trick is File > Open as Layers… which opens each image in a separate layer. (The bottom-most layer will be the first frame of the animation.) Then use Filters > Animation > Optimise (for GIF), Filters > Animation > Playback, then File > Export As… GIF and set animation parameters.
Steps
Only using GIMP once a month, I never learn a good workflow for batch operations on multiple images/layers. To speed up the straightening before the animation, in Layers dialog I selected every layer and chose Add Alpha Channel. Then I made a course polygonal Free Select as described above to roughly cut out the TV screens, since I moved slightly between each photo. I probably should have adjusted the layer’s opacity so I could see all layers at once. Then I hid all layers, selected and made visible each layer in turn, deleted more of that layer’s image to leave just the TV screen, and did the Perspective transformation.
After all this, we have a bunch of images at different places on the canvas. (I blame the smartphone operator for swaying like a drunken martial arts master between each photo). There’s an Image > Align Visible Layers… command, but that didn’t put all the layers in the same spot, probably because I forgot to invert a selection or complete the “crop” to the TV screen on one layer. So:
- In the Layers dialog make all layers visible and select them all, then Image > Crop to Content. You should have a small canvas tightly enclosing a messy stack of TV pictures.
- Now choose Image > Align Visible Layers…. and… nothing happens, because each layer is bigger than its contents. I forgot to choose Layer > Crop to Content on each layer. And you can’t select all layers at once and do this. So select and make visible each layer in turn, choose Layer > Crop to Content, and now try Image > Align Visible Layers. You want the Horizontal and Vertical styles to be Collect (otherwise nothing happens!?), and align to top left.
- The images are all nicely on top of each other, but they’re all slightly different sizes. Arggh. By selecting all in the Layers dialog, setting their Opacity temporarily to 50%, then making visible different ones in turn, I found one TV screen image was much taller than the others. So I selected it alone, and used Tools > Transform Tools > Scale to drag its bottom and right edges to make it closer in size to the others.
After all that, I was finally ready to see the animation, with Filters > Animation > Playback… It still wobbled around, but close enough. So Image > Scale Image… to 1280 wide (twice this blog’s column width), then Filters > Animation > Optimize (for GIF).
Then File > Export As… louis_wain_pavlovsky_animation.gif, check As animation, set the animation speed, click [Export], and… it doesn’t work, no file is created. I ended up reopening the multi-layer image in the current GIMP version 2.10 and exporting from that (and it worked!) Then I couldn’t reproduce the bug. It turns out export as animated GIF fails in this 3.0 pre-release if you have multiple layers selected; I filed a bug.
The Export GIF dialog lets you set the “Delay between frames where unspecified”, but I couldn’t remember if I had specified this delay or not; anyway, the animation was way too fast. So I used the free command-line tool ImageMagick to slow down the animation to 40/100ths of a second between frames: convert -delay 40x100 too_fast.gif a_bit_slower.gif